[Node.js] Airtable APIを使用する 1 (基本設定・レコード取得)
2023-02-01
2023-02-01
Node.jsからAirtable APIを使用し、レコードの取得を行う方法を解説します。
検証環境
- Windows 10 Pro 22H2
- Node.js v18.14.0
- airtable.js 0.11.6
テスト用の Tableを作成
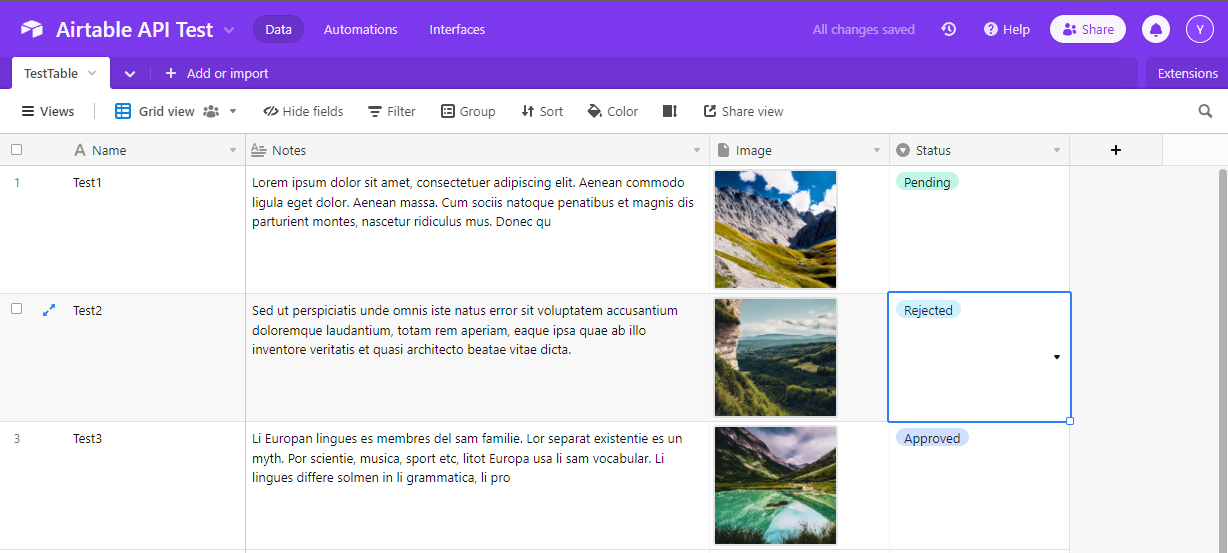
- 新規に Base を作成し、
Table NameをTestTableに設定します。 Name(Single Line Text),Notes(Long Text),Image(Attachment),Status(Single select)のフィールドを作成します。StatusフィールドにPending,Rejected,Approvedのオプションを作成します。
必要な情報
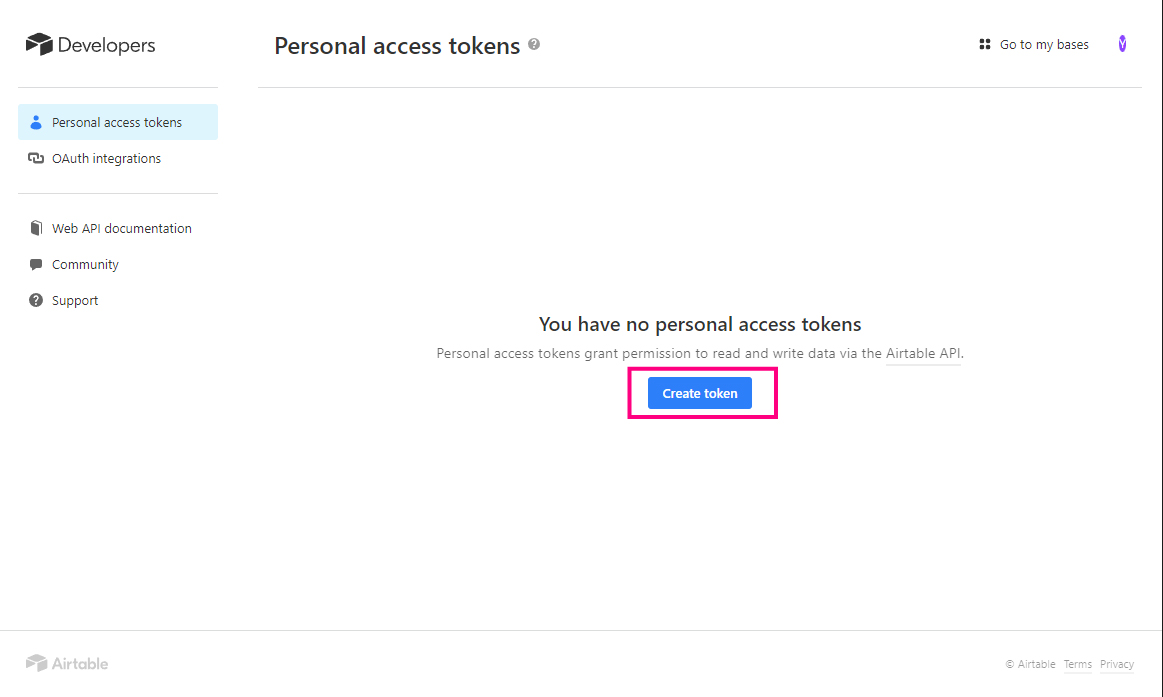
Personal Access Token
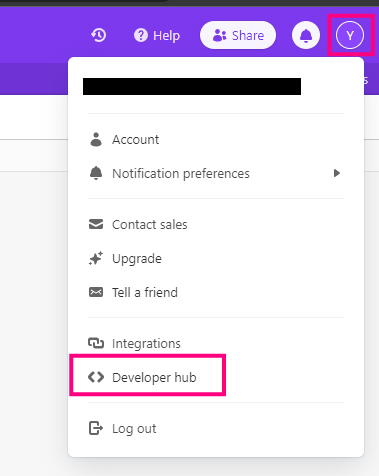
Developer hubをクリックします。
Create tokenをクリックします。
Nameに、任意のトークン名を入力します。Scopesに、必要な機能を追加します。(レコードの読み書きができればよいのであれば、data.records:readとdata.records:writeを追加します。)Accessに、API で操作したいワークスペースを設定します。Create Tokenをクリックします。
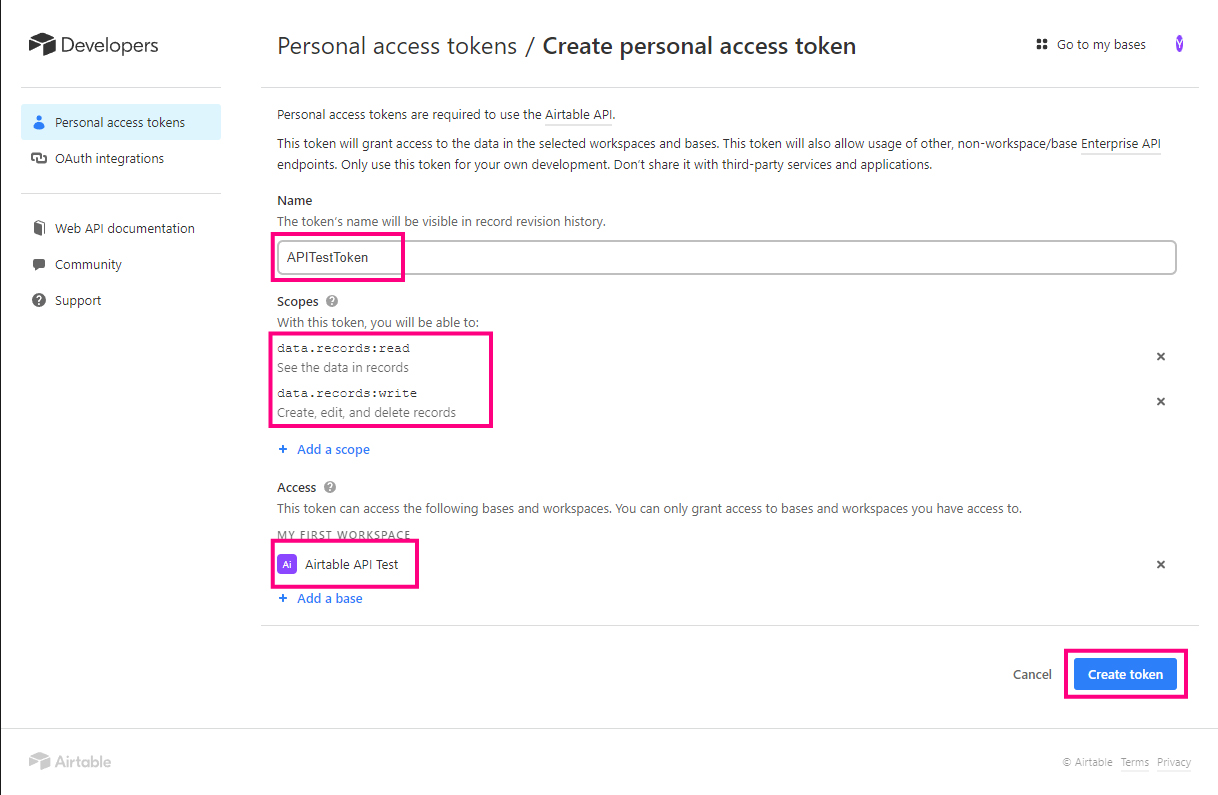
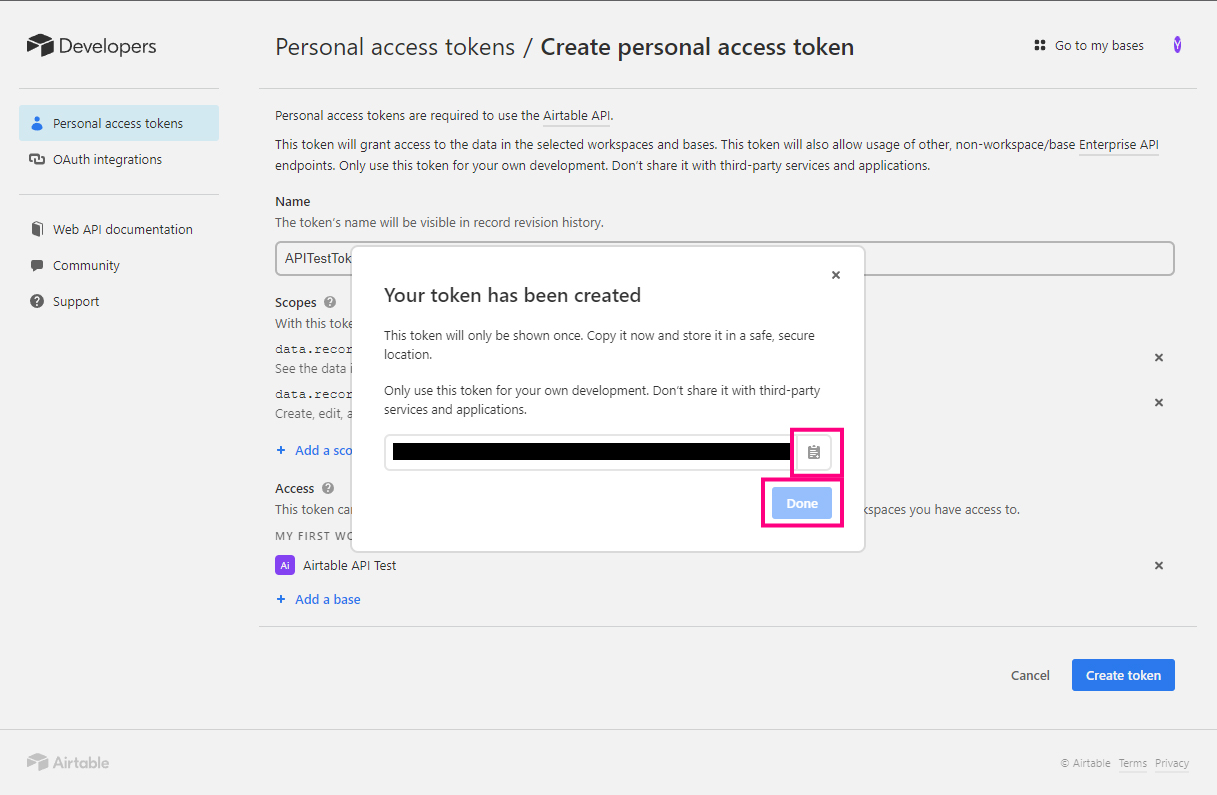
- トークンが作成されるので、部外者に見られない場所にメモしておきます。(トークンはこの画面でしか表示されません。メモするのを忘れてしまった場合は再度生成する必要があります。)
Base ID
- ワークスペースの URL の、
https://airtable.com/から次の/(スラッシュ)までの間の、app から始まる 17 文字をメモします。

Node.js
モジュールのインストール
Airtable.js と dotenv をインストールします。
npm install airtable dotenv
環境変数の設定
.env ファイルを作成し、上記の Personal Access Token と Base ID を記載します。
.env
AIRTABLE_API_KEY=[Personal Access Tokenを記載]
AIRTABLE_BASE_ID=[BaseIDを記載]
ID, Field の取得
listRecords.js
const dotenv = require('dotenv');
const Airtable = require('airtable');

dotenv.config();

// AirtableのAPI認証とBaseの取得
const base = new Airtable({ apiKey: process.env.AIRTABLE_API_KEY }).base(
  process.env.AIRTABLE_BASE_ID
);

const tableName = 'TestTable';
const recordArray = [];

// 指定したテーブルからレコード群を取得
base(tableName)
  .select()
  .eachPage(
    function page(records, fetchNextPage) {
      records.forEach(function (record) {
        // Fieldsを取得
        const fields = record.fields;

        // Attachiment Fieldにファイルがある場合、ID, URL, Typeを取得
        const images = fields.Image ? fields.Image : [];
        const imageData = [];
        images.forEach((image) => {
          imageData.push({
            id: image.id,
            url: image.url,
            type: image.type,
          });
        });

        // レコードのIDと、Name, Notes, Statusフィールドの値、Imagesフィールドに添付されたファイルの情報をまとめる
        const obj = {
          id: record.id,
          name: fields.Name,
          notes: fields.Notes,
          status: fields.Status,
          imageData: imageData,
        };

        recordArray.push(obj);
      });

      // 特に指定がない場合、レコード100件ごとに上記の処理が実行される
      fetchNextPage();
    },
    function done(err) {
      if (err) {
        console.error(err);
        return;
      }
      // すべてのレコードを取得したら、レコードの配列を表示
      console.log(JSON.stringify(recordArray, null, 4));
    }
  );
特定のグループのレコードのみ取得する
select の引数でfilterByFormulaを設定すると、特定の条件でフィルタリングしたレコードのみを取得できます。
base(pageName)
  .select({
    filterByFormula: '{Status}="Approved"', // Statusが'Approved'のレコードのみ取得
  })
  .eachPage(
    ...
  );
画像のダウンロード
Attachment Fieldの配列内のオブジェクトは以下のようになっています。(id, urlの値は一部省略しています)
{
  "id": "att...",
  "width": 512,
  "height": 512,
  "url": "https://v5.airtableusercontent.com/...",
  "filename": "dummy_4.png",
  "size": 462291,
  "type": "image/png",
  "thumbnails": {
    "small": {
      "url": "https://v5.airtableusercontent.com/...",
      "width": 36,
      "height": 36
    },
    "large": {
      "url": "https://v5.airtableusercontent.com/...",
      "width": 512,
      "height": 512
    },
    "full": {
      "url": "https://v5.airtableusercontent.com/...",
      "width": 3000,
      "height": 3000
    }
  }
}
urlプロパティを使えばファイルにアクセス可能です。
またtypeプロパティにはファイルの Mime-type が記載されています。
下記のソースコードは、mime-type モジュールでファイル形式に応じた拡張子を取得し、Axios で取得した画像を保存する関数です。
const fs = require('fs');
const path = require('path');
const Axios = require('axios');
const mime = require('mime-types');

const downloadImage = async (url, fileName, type, folder) => {
  if (!fs.existsSync(folder)) {
    console.log(`"${folder}" doesn't exist.`);
    return;
  }

  if (!type.includes('image/')) {
    console.log(`"${url}" is not an image file.`);
    return;
  }

  const ext = mime.extension(type);
  const dstFile = path.join(folder, `${fileName}.${ext}`);
  let res;

  try {
    res = await Axios.get(url, { responseType: 'arraybuffer' });
  } catch (error) {
    console.log(error);
    return;
  }

  try {
    fs.writeFileSync(dstFile, new Buffer.from(res.data), 'binary');
    console.log(`File saved : ${dstFile}`);
  } catch (error) {
    console.log(error);
    return;
  }
};